Ideas + Advice
- Headboard Ideas
- Bedroom Office Ideas
- What Is A Sham
- Stylish Bedroom Storage Ideas
- What Is TENCEL™ Fabric
- What Is A Platform Bed
- What Is A Daybed
- Black and White Bedroom Ideas
- What Is A Coverlet
- Bed Sheet Sizes Buying Guide
- Closet Organization Ideas
- Bedding 101
- Tips For Keeping White Bedding Bright
- How To: Create The Perfect Lazy Sunday
- How To: Style Your Dresser
- How To: Fold A Fitted Sheet
- How To: Put On A Duvet Cover
- How To Shop For An Upholstered Bed
- Choose The Right Bed + Headboard
- Inspiration: Bedrooms
- Layer Your Bed Like a Stylist
- How To Choose The Best Material For Outdoor Furniture
- Backyard Party Ideas
- Small Patio Ideas
- Guide to Outdoor Furniture
- Outdoor Planters 101
- 4 Ways To Upgrade Your Outdoors With Cityscape Planters
- 10 Ways To Get Ready For Summer
- How To: Make A Terrarium
- Create A Great Outdoor Space
- Inspiration: Outdoor Spaces
- Sunroom Decorating Ideas
- Feature Wall Ideas
- Decorating With Mirrors
- Window Treatment Ideas
- Inspiration: Pillows + Throws
- Choosing Paint Colors
- Choose The Right Curtains
- How To: Hang Curtains
- How To Style Your Bookshelves Like A Pro
- Get Organized With Baskets
- All About Wallpaper
- Create A Wood–Paneled Wall
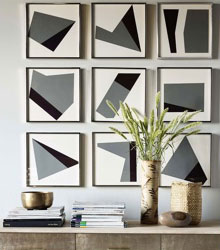
- How To: Create A Gallery Wall
- Decorating With White
- How To Decorate With Color
- Round Coffee Table Decor: West Elm Designer Tips & Tricks
- 10 Trendy Spring Decorating Ideas
- Bar Cart Ideas
- Fall Table Decor
- Christmas Color Palette Ideas
- 32 Christmas Tree Themes For A Festive Holiday
- Practical Housewarming Gifts
- White Christmas Decor Ideas
- Christmas Mantel Ideas
- Apartment Christmas Decorations
- How To: Host The Perfect Dinner Party
- Ways To Set Your Holiday Table
- Bar Cart Checklist
- A Guide To Great Gifting
- Last Minute Gift Ideas
- Easy Holiday Decorating
- Decorate Your Tree Like A Pro
- Entertaining With Alison Roman
- 6 Holiday Table Settings Ideas
- 15 of the Best Christmas Hosting Ideas
- Celebrate the Season with 20 Fall Table Decor Ideas
- How To Wash Linen Sheets
- How To Measure For Blinds
- How To Clean A Wool Rug
- How To Clean A Couch
- Comforter vs Duvet
- Measure For Delivery
- Upholstery Fabric Options
- Fabric Swatches
- Upholstery Ordering FAQs
- Assembly Instructions
- Linen vs Cotton
- Registry Do's + Don'ts
- Behind the Scenes: Tour Our Makers Studio
Decorating + Accessories
How To Apply Wood Paneling In 5 Easy Steps
If your walls are feeling bare or blah, wood paneling will give them texture and dimension, creating a distinctive backdrop for natural, rustic, industrial or even modern looks. Stikwood Adhesive Wood Panels are real, reclaimed pine wood in a variety of colors and finishes that can be added to walls, backsplashes, headboards and more. Many west elm designers use them for accent walls, but they also look great in an entire room. The wood panels are American–made and sustainably sourced from forests certified to Forest Stewardship Council® standards. It's as easy as peeling and sticking—all you need is a clean, flat surface and a little imagination. Let's get started!
What you'll need:
- Pencil
- Level
- Hammer (for removing nailheads)
- Measuring tape
- Hand miter saw
- Hand roller
Before starting:
- Unwrap your Stikwood planks and let them acclimate for 48-72 hours
- Make sure that any new wall paint has dried for 4-5 days
1. GET YOUR SURFACE READY
Make sure the area you want to cover is clean, dry and even. Remove any nailheads, outlet and light switch covers, or anything else sticking out from the wall.
2. MEASURE
To determine how many sets you'll need, measure the height and width of your space in inches, then multiply those two numbers. Divide that number by 144; this is how many square feet you'll need to cover. Most Stikwood sets cover 20 square feet (each panel is about 5" wide and 48" long).
3. SET THE PATTERN
Staggered planks, vertical, chevron—there are endless possibilities with Stikwood. Starting near the center of your wall, use a level to draw a straight horizontal line (in pencil) about 20" long. This will be your reference line.
4. APPLY YOUR PLANKS
For a staggered plank pattern, peel off the adhesive covers and install one plank above your reference line and one plank below, staggering them about halfway. Continue to add planks end to end until the wall is filled. Where necessary, trim the planks using a saw, so they fit flush against the wall's edges.
5. PRESS THEM DOWN
Using a hand roller, firmly press the panels onto the wall.
And that's it!
Stikwood panels aren't exclusively for walls, either. Here are some of our favorite spots to add a touch of rustic style:
- Kitchen backsplash
- Kitchen island
- Pantry doors
- Behind shelves
- Lounge area
- Behind a TV or media console
- Headboard
The only place not recommended for Stikwood panels is in high–moisture areas such as bathrooms.
Rather not do it yourself? Our installation pros will install your panels for just $129 per hour. Ask a store associate or make an appointment at westelm.com/style–service.